Guide to fast Next.js
Insights into how Tinloof measures website speed with best practices to make faster websites.

Seif Ghezala
2024-01-15 · 13 min
Let's build a simple app where:
1. Users sign up and join a waitlist.
2. Upon admin approval, users get a notification email and can use the app.
We'll use Next.js, Supabase, and Resend.
The code for this tutorial can be accessed here.
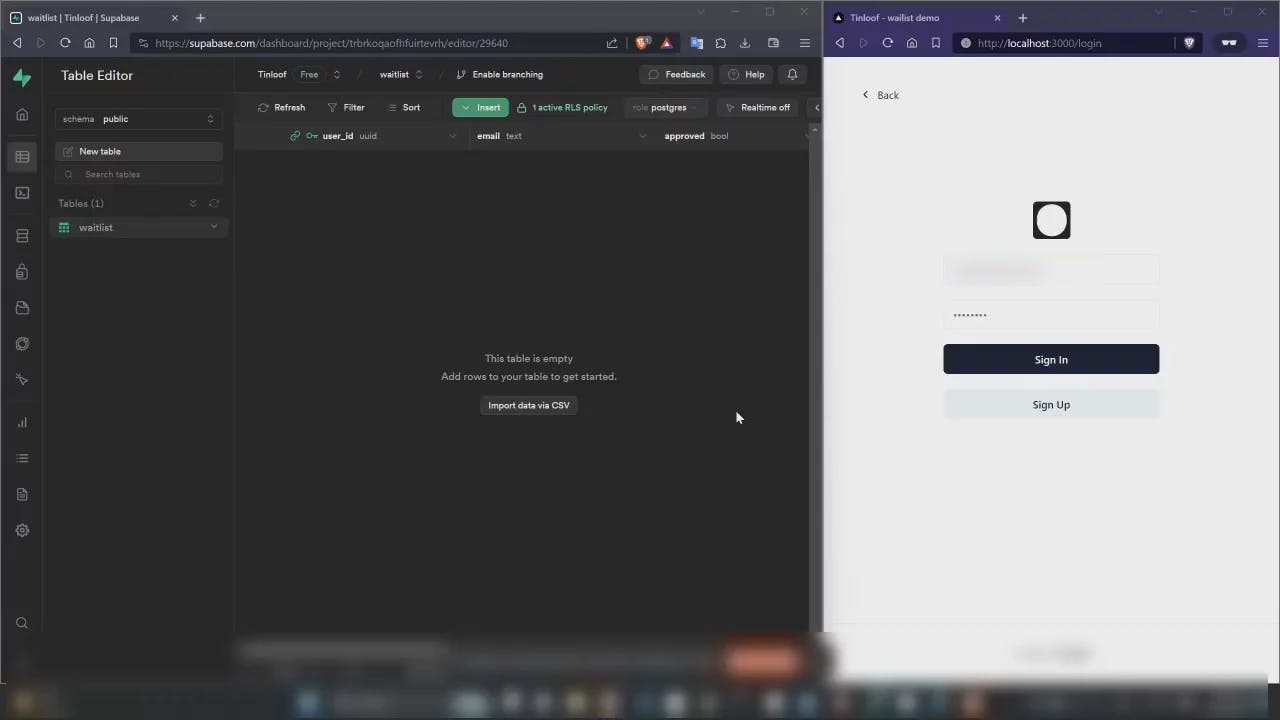
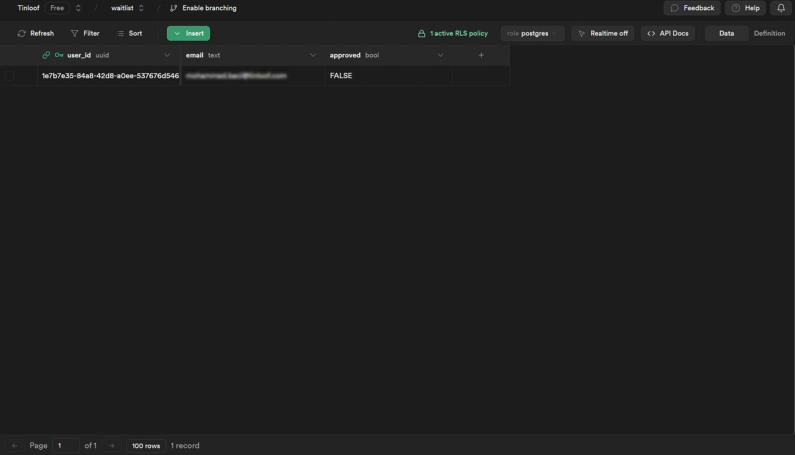
Let's first setup a project from the Supabase dashboard and create a waitlist table from the Supabase SQL editor :
create table waitlist (user_id uuid not null references auth.users on delete cascade,email text unique not null,approved boolean not null default false,primary key (user_id));alter table waitlist enable row level security;CREATE POLICY "Users can read their own waitlist row" ON "public"."waitlist"AS PERMISSIVE FOR SELECTTO authenticatedUSING ((auth.uid() = user_id))
What the query does:
user_id, email and approved columns.user_id column from the built-in auth.users table that holds all signed-up users. Therefore, user_id is both a foreign and primary key.auth.users table is deleted, its corresponding waitlist row is deleted as well.approved is a boolean value that determines whether the user has access to the app or not.
Now let's create a database function, handle_new_user , that populates a waitlist row whenever a new user signs up:
create function public.handle_new_user () returns trigger language plpgsql security definersetsearch_path = public as $$begininsert into public.waitlist (user_id, email)values (new.id, new.email);return new;end;$$;create trigger on_auth_user_createdafter insert on auth.users for each rowexecute procedure public.handle_new_user ();
Let's use create-next-app to create a Next.js project with authentication already backed-in:
npx create-next-app -e with-supabase
Once Supabase environment variables are filled in, we can run the project locally.
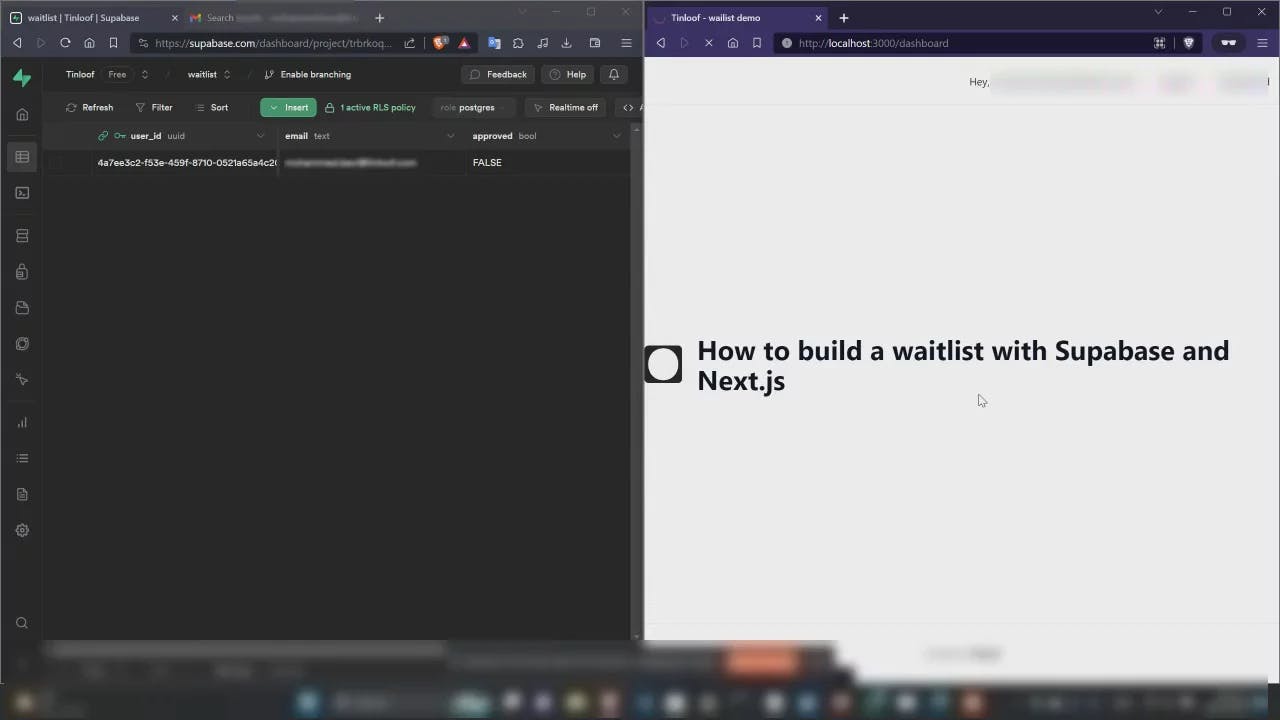
Notice that signup already works and creates a waitlist entry.
Let's create the following 2 pages:
// app/dashboard/page.tsxexport default function Dashboard() {return (<div className="text-center min-h-screen flex flex-col justify-center gap-5"><h1 className="text-6xl font-medium">You're in!</h1><p>Welcome to the dashboard! We're excited to have you on board.</p></div>);}
// app/waitlist/page.tsxexport default function Waitlist() {return (<div className="text-center min-h-screen flex flex-col justify-center gap-5"><h1 className="text-6xl font-medium">Hold on!</h1><p>We're not quite ready for you yet. We'll let you know when we're readyto onboard you.</p></div>);}
To make the access logic work, let's some redirects it in the middleware.ts file, which is executed before a user accesses any route:
import { NextResponse, type NextRequest } from "next/server";import { createClient } from "@/utils/supabase/middleware";export async function middleware(req: NextRequest) {const { supabase, response } = createClient(req);const { data } = await supabase.auth.getSession();// If the user is accessing a page other than dashboard, do nothingif (req.nextUrl.pathname !== "/dashboard") return response;const userLoggedIn = !!data?.session?.user;// If the user is not logged in, redirect to login pageif (!userLoggedIn) {return NextResponse.redirect(req.nextUrl.origin + "/login");}// If user is logged in.// Fetch the user's waitlist entryconst { data: waitlistEntry } = await supabase.from("waitlist").select("approved").eq("user_id", data.session?.user.id).single();// The user is approved, allow access to dashboardif (waitlistEntry?.approved) return response;// The user is not approved, redirect to waitlist pagereturn NextResponse.redirect(req.nextUrl.origin + "/waitlist");}
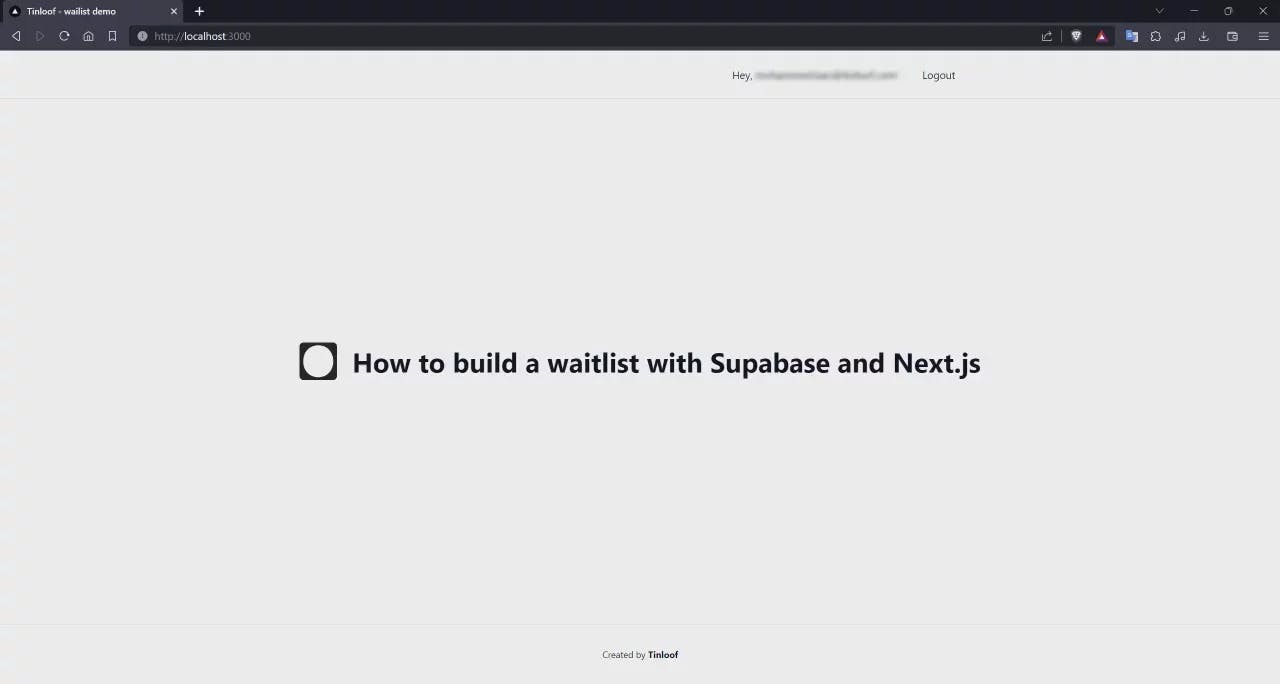
Logged-in users are now redirected to the waitlist if they try to access the dashboard before getting approved on the waitlist:
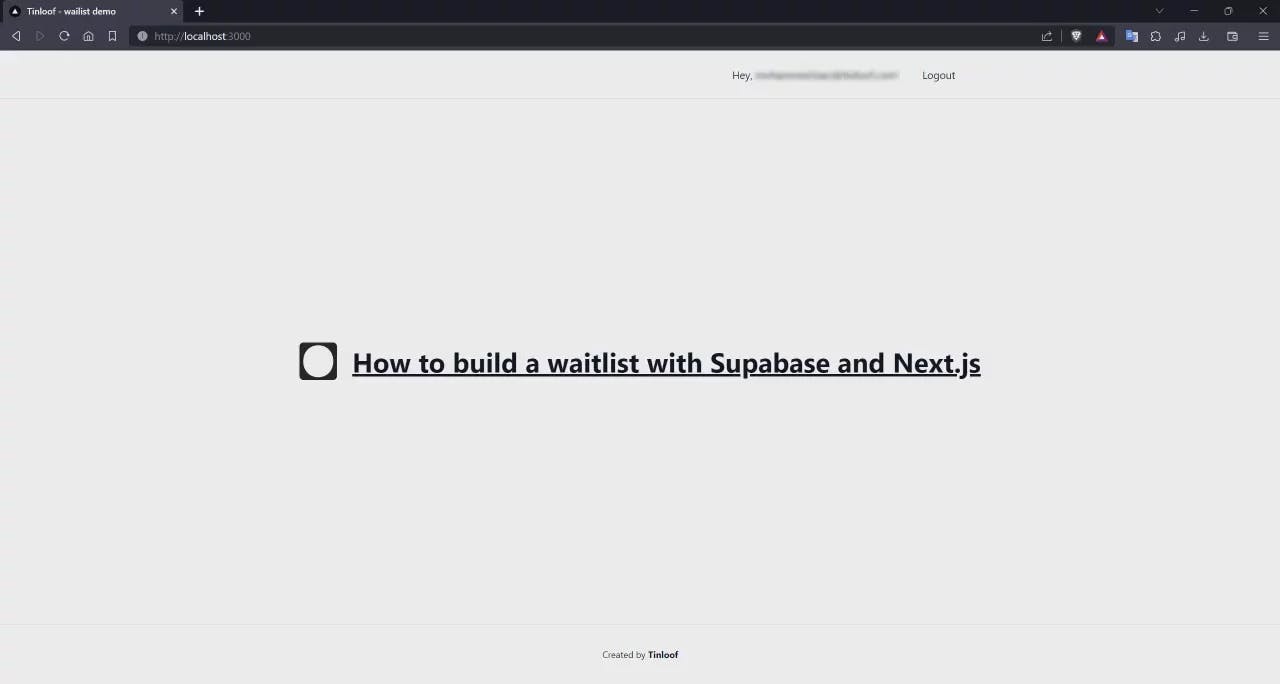
Setting approved to true on the waitlist table makes it possible for users to access the dahsboard:
Let's use Resend to notify users by email whenever they have granted access to the app.
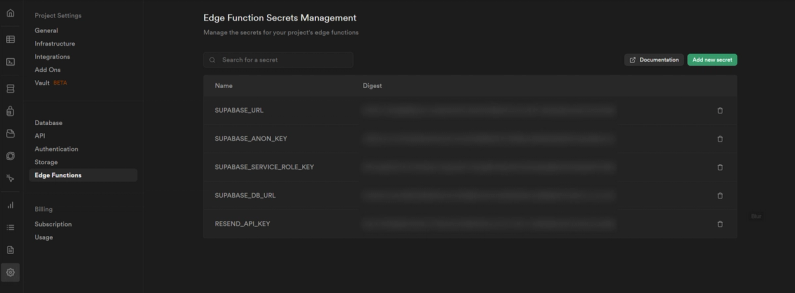
Once a Resend account is created, we can generate an API key and store it on Supabase secrets with the alias RESEND_API_KEY.
We'll use Supabase CLI to create and deploy an edge function that sends emails.
First, we login with the Supabase CLI:
npx supabase login
Then we initialize a local Supabase project:
npx supabase init
A new supabase folder will be generated at the root of the application.
Now let's link it to the remote Supabase project:
npx supabase link
With the CLI linked, let's run the following command to create a Supabase edge function named send-approval-email and instruct it to send an email using Resend:
import { serve } from "https://deno.land/std@0.168.0/http/server.ts";import { createClient } from "https://esm.sh/@supabase/supabase-js";// The Resend API key is stored in an environment variable from the Supabase dashboardconst RESEND_API_KEY = Deno.env.get("RESEND_API_KEY");const handler = async (_request: Request): Promise<Response> => {const json = await _request.json();const record = json.record;// If the new value of approved is not true, do nothingif (!record?.approved)return new Response(JSON.stringify({message: "User not approved",}),{status: 200,headers: {"Content-Type": "application/json",},});try {const supabaseClient = createClient(// Supabase API URL - env var exported by default.Deno.env.get("SUPABASE_URL") ?? "",// Supabase API ANON KEY - env var exported by default.Deno.env.get("SUPABASE_ANON_KEY") ?? "",// Create client with Auth context of the user that called the function.// This way your row-level-security (RLS) policies are applied.{global: {headers: { Authorization: _request.headers.get("Authorization")! },},});// Fetch the user's data from the auth.users tableconst { data: userData } = await supabaseClient.auth.admin.getUserById(record.user_id);const email = userData?.user?.email;// If the user doesn't have an email, do nothingif (!email)return new Response(JSON.stringify({message: "User not found",}),{status: 200,headers: {"Content-Type": "application/json",},});// The user has an email, and is approved, send the emailconst res = await fetch("https://api.resend.com/emails", {method: "POST",headers: {"Content-Type": "application/json",Authorization: `Bearer ${RESEND_API_KEY}`,},body: JSON.stringify({from: 'onboarding@resend.dev',to: email,subject: "You've been accepted 🎉",html: "<strong>You're in!</strong>",}),});const data = await res.json();return new Response(JSON.stringify(data), {status: 200,headers: {"Content-Type": "application/json",},});} catch (error) {console.error(error);return new Response(JSON.stringify(error), {status: 500,headers: {"Content-Type": "application/json",},});}};serve(handler);
This function receives a waitlist row and, if it's approved, retrieves the corresponding email address from auth.users and sends an email using Resend API and the api-key created earlier.
To deploy the function to Supabase, we run the following command:
npx supabase functions deploy send-approval-email
The function is now deployed and can be seen on the database functions screen on Supabase's dashboard.

All that is left is for us to create a database webhook that triggers the send-approval-email function whenever the waitlist table is changed.
To create a webhook, let's open the project's webhooks dashboard, and enable the feature.
Once we have the webhook table visible click on the Create new hook at the top right and fill in the hook info:
waitlist table that we want to listen to its changes.update event since that's what we want to listen for.send-approval-email function should be selected by default, if not select it.Authorization header to the webhook request.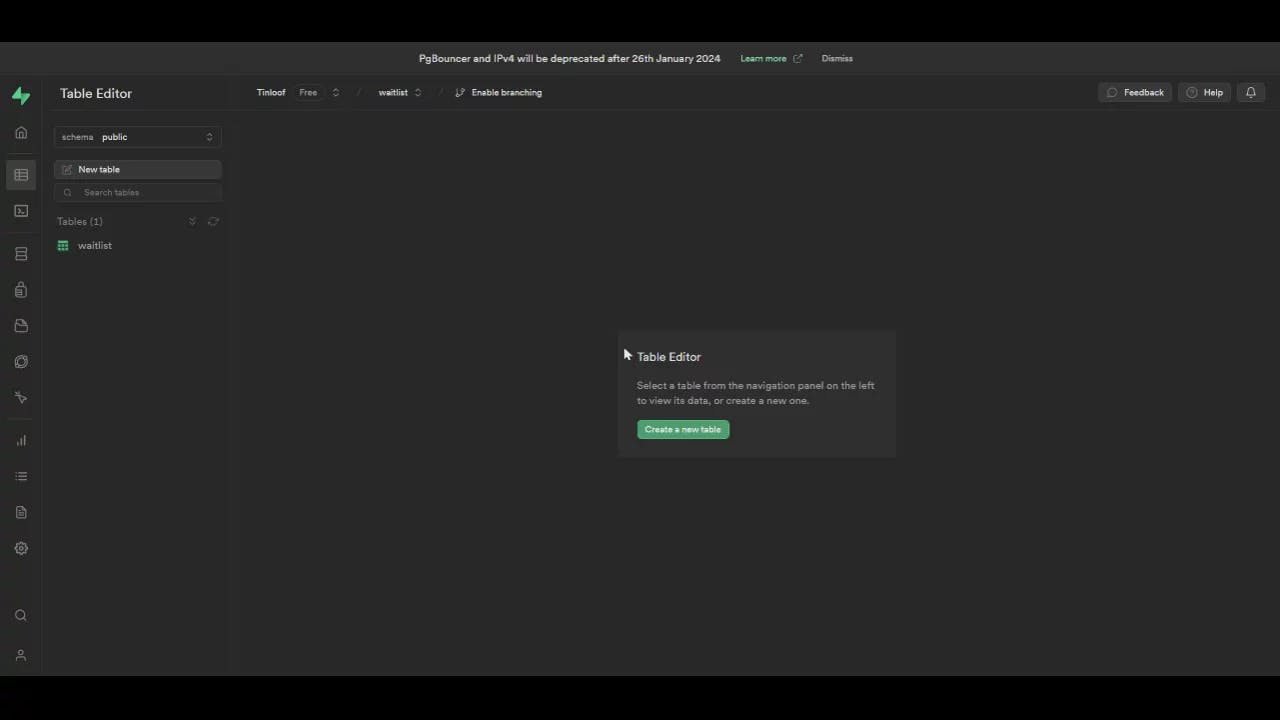
Now that the webhook is set, the entire flow can be tested.